Trust-First MLS Virtual Staging in 2026: A Practical Disclosure Workflow (That Still Converts)
If you’ve marketed a vacant listing in the last year, you already know the tension:
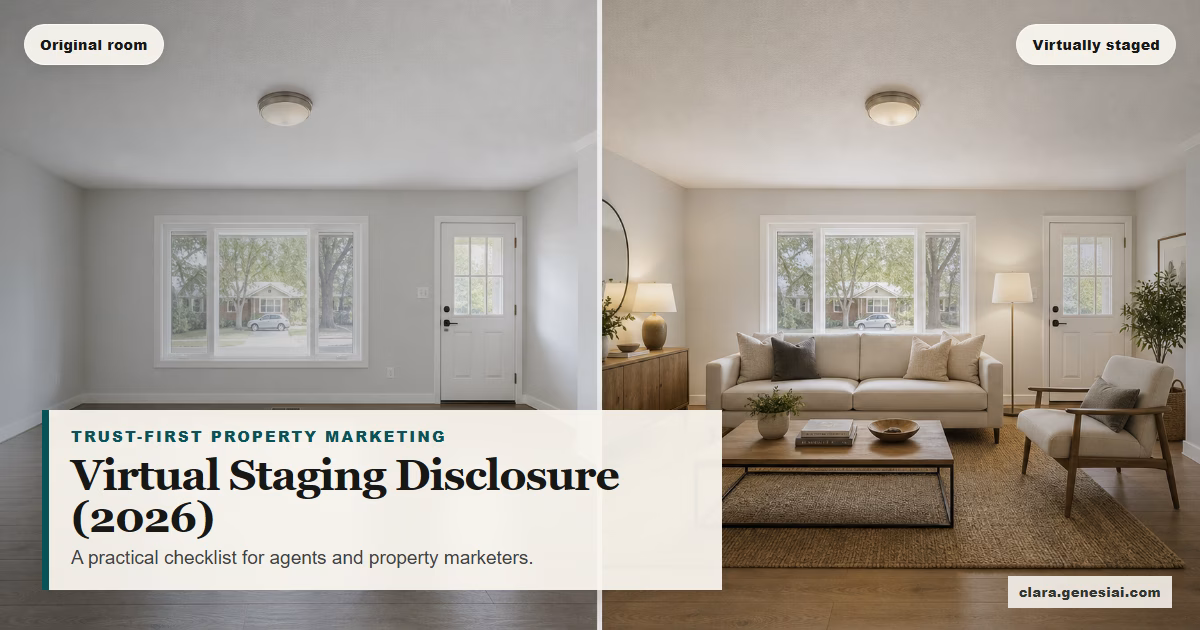
Empty rooms don’t sell online.
Bad (or undisclosed) virtual staging destroys trust.
And in 2026, the rules around “digitally altered images” are sharper—but not consistent across every MLS.
This guide gives you a simple, repeatable workflow for using virtual staging without stepping into “property catfishing” territory—and without slowing your listing pipeline.
You’ll learn:
What “digitally altered images” typically includes (and what it doesn’t)
The 3 things most rules have in common: label, original, placement
A “trust-first” staging workflow you can run on every listing
What you should never alter (even if the AI tool can)
How to reuse staged images for portals, social, and ads—without creating a disclosure mess
Throughout, remember: rules vary by MLS and jurisdiction. Use this as a baseline, then confirm your local MLS’s implementation requirements before you publish.
---
What Counts as “Digitally Altered” (And Why It Matters in 2026)
Most MLS policies and state guidance draw a line between:
1) Basic photo adjustments (typically okay) 2) Changes that materially alter what the buyer thinks the property is (needs disclosure, may be prohibited)
For example, California’s BPC §10140.8 (effective January 1, 2026) addresses digitally altered images used in real estate advertising and requires disclosure plus access to an original, unaltered image. (See the statutory summary and related guidance.)
And MLS implementations get specific. SDMLS, for instance, defines a process for “digitally altered images,” including labeling and providing an accessible URL to the original image. Some MLSs allow (or require) on-image disclosures; others explicitly prohibit embedding disclosure as a watermark and instead require using MLS fields and pairing with the original. (More on that in the workflow section.)
The practical takeaway: your workflow needs to produce:
A staged image (marketing)
The original image (truth anchor)
A consistent disclosure mechanism (compliance + trust)
---
The 2026 “Common Denominator”: Label + Original + Context
Even when the exact requirements differ, most policies converge on three expectations:
1) A clear label
Your audience should not be guessing whether the furniture is real. Some systems prefer:
“Virtually staged”
“Digitally altered”
“AI altered”
“Photo modified”
2) The original (unaltered) photo must be available
This is the simplest trust mechanism: buyers (and buyer’s agents) can compare staged vs original.
In some MLS rule sets, the original must appear immediately before/after the altered image. In other implementations, the original is uploaded separately and referenced via a URL in the altered image’s description field. (Again: check your MLS.)
3) You cannot materially misrepresent the property
This is where agents get burned.
“Virtual staging” is typically about personal property (furniture, décor). Many rules and FAQs explicitly warn against editing permanent features—walls, flooring, windows, landscaping, views, etc.—because that moves from “helping visualize” to “misrepresentation.”
NAR’s Code of Ethics (2026) frames this broadly under truthful advertising—agents should “present a true picture” in marketing and representations to the public. That principle is your north star even when the tooling changes.
---
A Trust-First Virtual Staging Workflow (MLS + Portals + Social)
Here’s the workflow you can use for every listing—designed to survive across channels.
Step 1: Decide what staging is for (and what it is not)
Use staging to answer one buyer question:
“How could this room work?”
Do not use staging to hide problems or invent upgrades:
Do not “fix” damaged flooring.
Do not swap countertops.
Do not “add” a view that doesn’t exist.
Do not change landscaping to imply curb appeal that isn’t there.
If you need renovation visualization, treat it as concept art and label it accordingly (and keep it out of MLS galleries that prohibit those alterations).
Step 2: Capture (or select) an “honest” base photo
The best staging output comes from a clean input:
Straightened lines (verticals corrected)
Correct exposure (no blown-out windows)
Minimal clutter (where possible)
If it’s tenant-occupied and cluttered, you can still stage—but be extra strict about disclosure and make sure you’re not “removing” real elements in a way your MLS disallows.
Step 3: Generate two assets per room: staged + original
For each staged angle, store:
RoomName_Angle1_original.jpgRoomName_Angle1_virtually-staged.jpg
This makes MLS compliance much easier later (especially when pairing or linking to originals is required).
Step 4: Apply the right disclosure format for your MLS
This is where teams get tripped up—because requirements conflict across systems.
Here are three common patterns you’ll see:
Pattern A — On-image disclosure + original adjacent Some MLS rule guides explicitly require an on-image disclosure (“virtually staged or altered”) and the non-staged image uploaded right before/after the staged one.
Pattern B — MLS label field + original URL in description (no watermark) Other MLS implementations require using MLS fields to label an image as “digitally altered” and placing a URL to the original image in the description field—while explicitly not embedding the disclosure on the photo as a watermark.
Pattern C — Description-only label + original adjacent Some rules allow a text-field label (“virtually staged”, “AI altered”) plus adjacent original—without requiring on-image disclosure.
Action: document which pattern your MLS uses and turn it into a one-page SOP your team follows every time.
Copy-paste disclosure language (use what fits your MLS)
Use simple language. Avoid defensive explanations. You want clarity, not a debate.
Listing description (short):
“Some photos have been virtually staged. Original, unaltered photos are included for reference.”
Listing description (slightly longer):
“Some images have been digitally altered/virtually staged to help visualize the space. Original, unaltered photos are included in the gallery for reference.”
Social caption (short):
“Virtually staged for visualization. See original photos in the listing gallery.”
Agent comment to buyers at showing (script):
“As noted online, some images were virtually staged to help you picture layout and scale. The home is shown empty today—let’s walk the room dimensions.”
Step 5: Publish staged images like a pro (sequence matters)
To keep trust high:
Place the original and staged image next to each other in the gallery.
Avoid burying originals at the end (it feels deceptive even if technically “included”).
Add a short disclosure line in the listing description, e.g.:
“Some images are virtually staged. Original, unaltered photos are included for reference.”
Step 6: Reuse staged images for portals + paid social (without creating risk)
A simple rule: if you run the image as an ad, it should still be clearly labeled.
For social/ads:
Add “Virtually staged” in the caption and/or the creative (depending on your local norms and platform constraints).
If the platform supports it, link to a landing page or gallery that also includes originals.
Avoid “before/after” that implies the property includes the furniture (unless it does).
Trust-first marketing converts better anyway: the buyers who book after a transparent listing are typically more qualified.
---
The Team SOP (So You Don’t “Forget” on a Busy Listing Week)
If you’re a broker/marketing lead, don’t rely on individual memory. Write the process once.
Here’s a lightweight SOP you can paste into your internal wiki:
Virtual staging SOP (v1)
1) Create staged images only for furniture + décor (no permanent feature edits).
2) For every staged image, keep its paired original in the same angle.
3) Apply MLS-required disclosure method:
label field / description / on-image disclosure
original placement requirements (adjacent or URL-linked)
4) Publish originals next to staged images. 5) Add a 1-line disclosure in listing description. 6) If used in ads/social, disclose there too. 7) Final check: “Would a buyer reasonably think this is the actual condition?” If yes → label more clearly or don’t use it.
Assign an owner:
If the photographer delivers the staged set, the marketing coordinator confirms MLS compliance.
If the agent generates staging in-house, the agent confirms compliance and the coordinator spot-checks before syndication.
---
The “Do Not Alter” List (Even If the Tool Makes It Easy)
If you only remember one section, make it this one.
Many MLS FAQs and rules distinguish between staging (furniture/décor) and modifying real property elements (often not permitted unless the listing truly includes those improvements).
As a general best-practice, avoid altering:
Walls, paint colors, flooring, cabinetry
Structural changes (doorways, wall removals)
Landscaping / exterior features
Views through windows (skyline, water, mountains)
Power lines, neighboring buildings, roads, or “unflattering” surroundings
If your goal is to show “potential,” use a labeled renovation concept sheet outside MLS rules that prohibit it, and always keep originals available.
---
What “Good” Staging Looks Like (A Quick Quality Control Check)
One reason disclosure is becoming stricter is that staging quality has improved—buyers can’t always tell what’s real. That’s good for marketing only if you’re transparent.
Before you publish, do a 60-second QC pass:
1) Lighting match: shadows and brightness align with the room’s light source(s).
2) Perspective: furniture sits on the same floor plane; no “floating legs.”
3) Scale: sofa/table/bed sizes feel believable versus doors/windows.
4) Material realism: fabrics and wood have texture (not plastic-smooth).
5) Context: style fits the property + buyer profile (starter vs luxury, urban vs suburban).
If you fail 2+ checks, regenerate. Bad staging is worse than no staging.
---
Where Clara Fits (Without Making You a Prompt Engineer)
Clara is an AI-powered visual transformation platform designed to help you turn ordinary listing photos into persuasive marketing visuals—fast.
For real estate teams, that typically means:
Virtual staging for vacant rooms (so listings feel warm and readable)
Consistent style across a full gallery (so the listing looks professional, not random)
Rapid iterations (so you can pick the version that matches the property’s price bracket and buyer profile)
Clara is built for practical workflows:
You don’t need to be a prompt expert to get strong results.
You can still bring prompts when you want more control.
You can regenerate quickly to avoid “fake-looking” outputs that harm trust.
If you want to test the trust-first workflow in this article, start with a single room:
1) Pick one clean, empty room photo 2) Generate a staged version 3) Keep the original alongside 4) Publish with clear disclosure
Try Clara here: https://clara.genesiai.com